Food Photography Tips
If you want to improve your Instagram or update your restaurant’s website, professional photos of your food help legitimize your business and appeal to new customers. Taking these photos yourself saves money and time, but capturing appetizing pictures of your dishes requires more than just a good camera. Lighting, composition, styling, and editing all play a crucial role in creating stunning food images that make mouths water. By understanding the principles of food photography and implementing some fundamental techniques, you can bring your culinary creations to life on screen and entice customers to indulge in your offerings.
1. Find the Perfect Lighting
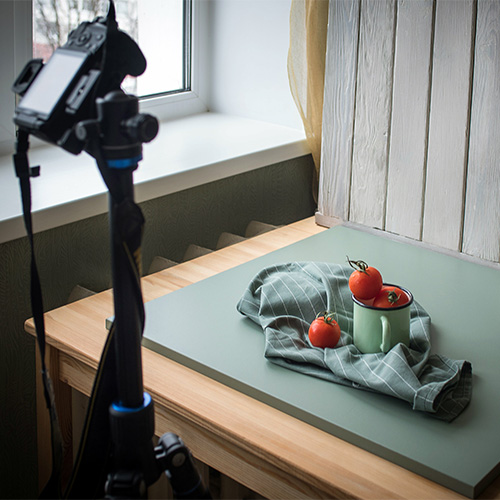
Lighting makes or breaks a photo, accenting colors and shapes more effectively than editing software. Finding the perfect lighting helps you capture appealing images that showcase your dishes in the best possible way. Here are some tips to help you achieve optimal lighting for your food photography:
- Utilize natural light: Natural light is often the best option for food photography as it provides a soft, diffused light that enhances the colors and textures of your dishes. Position your subject near a window or in a well-lit area to make the most of natural light.
- Avoid harsh fluorescent lighting: Harsh fluorescent and other indoor lighting creates unflattering shadows and colors in your photos. If you shoot in a commercial kitchen with fluorescent lighting, consider using diffusers or filters to soften the light and minimize its negative effects on your images.
- Be careful of shadows: Pay attention to where shadows fall and adjust your lighting setup to minimize harsh shadows that could obscure the defining details of your dishes.
- Avoid flash: While it may be tempting to use a flash to brighten your photos, it creates unappealing reflections and washes out the colors of your dishes. Opt for a natural lighting source that provides a softer, more natural-looking illumination.
- Avoid direct sunlight: Direct sunlight can be too harsh and create strong shadows that may not be flattering for your food photography. Look for shaded areas or shoot in rooms lit by natural light, but avoid placing food directly in the light.
2. Try Different Angles
The angle you choose should accentuate the unique elements of the type of food you’re shooting. Pay attention to how the food’s texture, color, and composition appear from different angles. Use these guidelines as a starting point for different angles:
- Shooting from above: Flat foods such as pizza, charcuterie, and appetizers, or large dishes like rotisserie chickens or whole turkeys.
- Shooting from the side: Shaped foods such as burgers, fruits, cakes, sandwiches, or wraps.
- Shooting from a 45-degree angle: Tall foods and drinks like soup, milkshakes, salads, or ice cream.
- Experiment from multiple angles: If an angle isn't working, try different approaches until you find an option that matches your vision.
3. Involve an Action
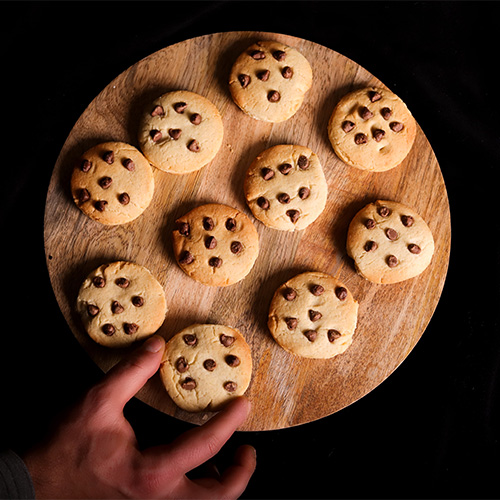
Action shots are a great way to create dynamic photos that captivate your audience. Incorporating movement into your food photography adds excitement and energy to your images. This style is especially effective for liquid foods like soups, drinks, and ice cream, or items with garnish you can add during the shot.
Here are some popular ideas for dynamic photos:
- Liquid pouring into a bowl or cup
- Placing toppings or garnishes on a dish
- Drizzling sauce on a dish
- Sprinkling powdered sugar on a dessert
- Scooping a spoonful of soup from a bowl
- A hand holding finger-food items
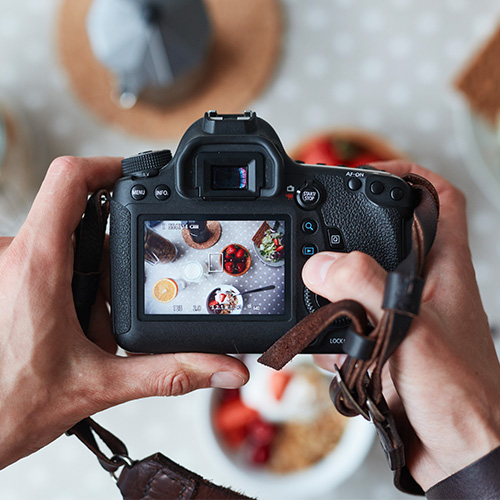
4. Learn Basic Editing
Employing basic editing techniques helps your photos stand out on a social media feed. Editing software allows you to sharpen images and adjust the focus, making the food pop against the background. Many food photographers invest in Lightroom, Photoshop, or a similar editing platform to fix issues with photos. Some common edits include:
- White balance: Use the white balance tool to fix odd coloring in your images. Simply click on items that should be neutral colors, like napkins, menus, or shadows, to adjust their colors.
- Levels: Light should highlight the most important part of your photo, so adjust the levels to brighten or darken parts of your image.
- Contrast, brightness, sharpness, and saturation: Make minor edits in these areas to ensure the food pops in the image, allowing you to accent the natural features of the photograph.
5. No Staging Shortcuts
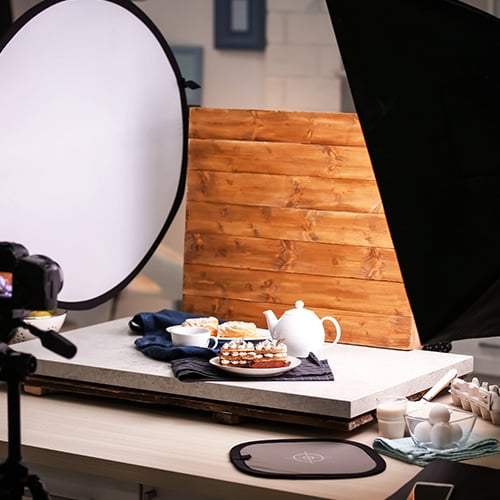
Adding styling to your food for photos is a delicate balance between adding personality and avoiding clutter. Avoid overwhelming viewers by keeping the sets simple, but adding the right props differentiates your photos on social media. Choose colors and settings that accentuate the food, such as a rustic wooden tabletop for boneless wings or white drapes for a flowery cake.
- Be true to the food: Understanding the setting where customers enjoy specific foods will help you shoot dishes in the appropriate context. For example, a s'mores dessert is often associated with a rustic, outdoorsy setting and might shoot best outside.
- Try different props and backgrounds: Garnishes, utensils, napkins, and dishware add a unique flair to your photos. Add a few compatible items to each photo to make the image seem more natural.
- Find the best surface: Experiment with wood, tile, cloth, and stone surfaces to find one that matches your set. Many hardware stores carry flooring samples, allowing you to try multiple options inexpensively.
- Less is more: Too many props or a busy background draws attention away from the food. Ensure your photos are not distracting by minimizing props and complex backgrounds.
- Don't clash colors: Color scheme affects customer perception, causing a dish to appear appetizing or distasteful. Choose colors that blend well together for a beautiful image.
6. Establish Your Brand
In digital marketing, brand perception motivates customers just as strongly as the products. Your food photos are often the first taste of your establishment to new customers, so it's vital to create a positive, accurate impression. Maintain a cohesive look that aligns with your brand on your Instagram, website, Facebook, and other platforms using similar angles, lighting, and color schemes. Additionally, make photos feel authentic by using natural settings and props from your actual business.
7. Study Your Inspiration
When learning a new skill, it's best to find someone who excels in their craft and mimic them. Many fantastic food photographers showcase their work on social media and websites, giving you the perfect opportunity to learn from the best. Whether you like a photographer's composition, lighting techniques, or styling choices, identify what draws you to their photos and dedicate time to studying their work closely. Note the angles they use, the way they play with light and shadows, and how they compose their shots.
Once you find photographers you like, try to replicate their techniques and compositions in your food photography. By doing so, you can gain a deeper understanding of the thought process behind their images and how you can apply similar principles to your work. Remember, imitation is a form of flattery and a valuable learning tool in food photography.
8. Common Food Photography Mistakes
Like most skills, taking high-quality food photos requires patience and practice. Over time, you'll learn what lighting, lenses, and styling choices work best for your food. As you begin, avoid these common pitfalls as you begin your food photography journey.
- Blurry photos: If your pictures are blurry, place the camera on a tripod to hold it steady and check that the tripod is level. Move to a space with better lighting and increase the shutter speed if the blurriness persists.
- Colors look off: Adjust the white balance while editing your photos to remove inaccurate colors. Shooting in RAW format makes it easier to adjust the color balance in the editing process, but isn't necessary.
- Poor editing: Some new photographers might overedit their photos seeking the perfect "pop" or will fail to edit them enough. Make simple edits to contrast, levels, and sharpness that accentuate your food, and be careful not to add unnatural effects.
- Incorrect lens: If you're using a physical camera, find the right lens that focuses best on your food. Some photographers prefer fixed lenses that don't zoom, which gives them greater control over the photo's depth.
- Too busy: Staging photos is fun, but some photographers add too many elements to their sets and make the images feel cluttered. Keep the styling simple to ensure the focus stays on the food you're showcasing.
- Inconsistency: Using drastically different lenses, angles, lighting, and colors on photos featured in your menu and website hurts your branding and makes your photos look clumsy. Avoid cognitive dissonance by keeping photos similar, though not identical.
Dedicating time and effort to enhancing your food photography abilities is a valuable tactic for enhancing your restaurant's marketing approach. With a wide array of food options, backgrounds, and photography elements to experiment with, you can unleash your creativity to attract new customers and retain loyal ones.